How to Turn a Studio Space into a Multi-Purpose Creative Hub
- Details
Maximise Your Studio’s Potential
In today’s flexible and ever-evolving creative world, a studio that can wear multiple hats is more than just a convenience—it’s a smart investment. Whether you're a photographer, designer, content creator, or all of the above, having a space that adapts to your needs means fewer limitations and more opportunity for innovation.
Maybe you're looking to host workshops one day, shoot a product campaign the next, or simply want a space where you and your team can brainstorm, build, and collaborate. A multi-purpose creative hub is the ultimate solution.
The best part? You don’t need a huge warehouse or a big budget to make it happen. With a bit of planning and some clever design thinking, any studio can be transformed into a space that’s functional, inspiring, and totally you.
Let’s break it down and explore how to turn your studio space into a creative hub that works as hard as you do.
Step 1: Define Your Core Purposes
Before you start rearranging furniture or buying new gear, take a moment to get clear on what you need the space to do.
Ask yourself:
- What are the main activities that will happen here? (e.g. photography, meetings, painting, content creation, workshops)
- Will clients visit the space, or is it just for your internal team?
- How often will each type of activity take place?
- Do you need quiet zones, active zones, or both?
Knowing your non-negotiables will guide your layout, storage, and furniture decisions. For example, if you're shooting video content and also holding client meetings, you’ll need a way to separate your filming backdrop from a more professional seated area.
Step 2: Embrace Modular Design
One of the most effective ways to create a truly versatile studio is to think modular.
What does that mean?
It means investing in elements that are flexible and easy to move, fold, collapse or stack—so your space can transform depending on the task at hand.
Here are a few modular ideas:
- Foldable tables and desks that can be tucked away between shoots or events
- Wheeled storage units that double as room dividers
- Mobile whiteboards or pinboards that can be moved between zones
- Stackable stools and chairs for workshop days or group sessions
- Portable partitions for creating private areas or changing up the backdrop
Modular doesn’t have to mean boring either—there are loads of stylish options out there that blend form and function beautifully.
Step 3: Map Out Zones for Different Activities
Zoning is your best friend when it comes to making a studio feel bigger, more organised, and multi-functional. Even in a small space, you can create invisible boundaries that define how areas are used.
Some common studio zones might include:
- Creative production area: your main workspace for photography, painting, or filming
- Desk/office zone: a place for admin, editing, or design work
- Chill or client area: a casual spot with a sofa or comfy chairs for meetings or downtime
- Workshop zone: if you teach classes, a setup with tables and chairs you can easily rearrange
- Storage zone: organised shelving, cupboards, or closets for gear and supplies
Try using rugs, lighting, furniture placement, or vertical storage to visually separate these zones without closing them off entirely. Open and airy is the goal!
Step 4: Invest in Storage That Works for You
Let’s be honest—creative people accumulate a lot of stuff. Cameras, props, sketchbooks, paints, cords, lighting gear… it all adds up.
Clutter can kill creativity and make your space feel chaotic, so smart storage is key to keeping your hub functional and stress-free.
A few ideas:
- Labelled baskets and bins keep smaller supplies sorted and easy to find
- Vertical shelving maximises wall space (especially great for narrow studios)
- Hidden storage benches or ottomans serve double duty for seating and stashing
- Clear containers or drawers let you see everything at a glance
- Pegboards or slatwalls are perfect for hanging tools and supplies without taking up floor space
Pro tip: Try a “use-it-or-lose-it” audit every few months. If something hasn’t been used or moved in 6 months, it may be time to donate or toss it.
Step 5: Lighting is Everything
Lighting can completely transform how your space functions—and how it feels.
Think in layers:
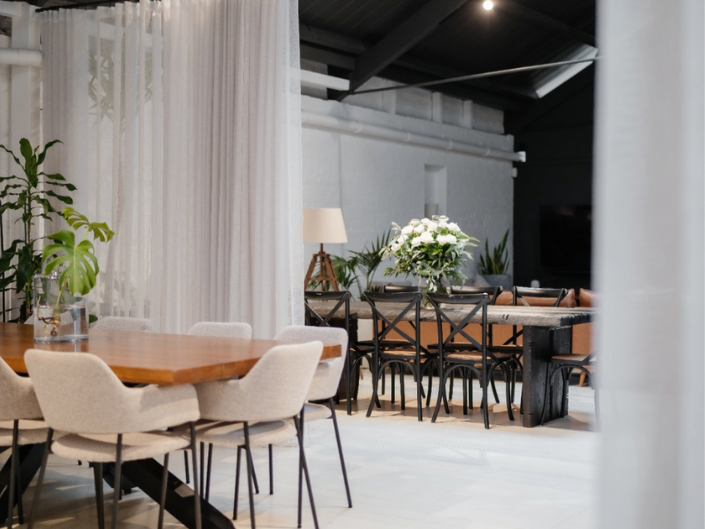
- Natural light: If you’ve got it, make the most of it! Use light, sheer curtains to diffuse glare while keeping things bright.
- Task lighting: Desk lamps, LED panels, or ring lights can help when you're working late or shooting content.
- Ambient lighting: Think floor lamps, wall sconces, or smart bulbs with dimmers to adjust the vibe depending on the activity.
- Accent lighting: Add personality with string lights, LED strips, or coloured uplighting to bring warmth and character to your studio.
If you do a lot of video content or product photography, consider setting up a dedicated area with controllable lighting to minimise setup time between shoots.
Step 6: Make It Feel Like You
Your studio should feel like a reflection of your creative identity—not a cold, characterless box.
A few ways to add your personality:
- Hang your own artwork, sketches, or moodboards
- Display favourite books, objects, or pieces that inspire you
- Use colour to differentiate zones or create a signature look
- Add plants to soften the space and improve air quality
- Choose furniture and décor that make you happy—not just what’s trendy
The more the space feels like yours, the more motivated and at ease you’ll feel working in it.
Step 7: Create Systems That Keep Things Running Smoothly
Now that your space is set up to be flexible and beautiful, think about the systems that support the way you work.
Do you need:
- A calendar on the wall to track studio bookings or content shoots?
- A cleaning schedule to reset the space weekly?
- A checklist for setting up or packing down certain areas?
These small systems can save a ton of time, especially if you’re juggling multiple creative projects or collaborators.
Step 8: Open the Space to New Opportunities
Once your studio is working well for you, it’s worth considering if it could also serve others—and help pay for itself.
Could you:
- Rent it out to photographers, podcasters, or yoga teachers during your off-hours?
- Use it to host creative workshops, meetups, or exhibitions?
- Offer it as a pop-up space for local makers or product launches?
- Collaborate with other creatives to co-host events or residencies?
A multi-purpose hub doesn’t just support your work—it can become part of a wider creative ecosystem. And that’s pretty powerful.
A Studio That Grows With You
Transforming a studio into a multi-purpose creative hub isn’t just about clever furniture or zoning hacks—it’s about creating a space that grows with your ideas.
Whether you’re just starting out or evolving into new creative territory, having a studio that can flex and adapt to your needs is the best kind of support system. It lets you stay agile, experiment more, and say "yes" to opportunities you might otherwise pass up.
Start small. Focus on what matters most to you. Let the space evolve over time. Before you know it, you’ll have a creative hub that not only works for everything—but feels like home.
If you’re looking for a multi-purpose studio space to rent or list your own, check out Sharedspace to explore inspiring studios around New Zealand that are ready for action.
Enjoyed this article?
Check out How to Turn Your Unused Space into Income with Sharedspace.


